

Ever imagined bringing a splash of 3D wonder to your web pages? Well, you’re about to embark on an exciting journey into the realm of Three.js! In this guide, we’re not just going to explore the magic it holds, but we’re going to have some hands-on fun with its most dazzling features. And rest assured, we’re going to keep it as interactive and enjoyable as a carnival ride!
So, are you ready to kickstart this adventure into the vibrant world of Three.js?
What is Three.js?
Three.js is a JavaScript library that makes it easy to create 3D graphics on the web. Whether you’re building games, visualizations, or interactive experiences, Three.js is your ticket to the third dimension. Let’s embark on this journey!
Cool Features of Three.js
1. Cross-Platform Compatibility
One of the standout features of Three.js is its seamless compatibility with various web browsers. Whether your audience is using Chrome, Firefox, Safari, or Edge, Three.js ensures a consistent and captivating 3D experience across platforms.
2. Abundance of Geometry and Materials
With Three.js, you have access to a rich library of predefined geometries (like cubes, spheres, and planes) and materials (including basic, Lambert, Phong, and more). This makes it easy to create intricate 3D scenes with minimal effort.
3. Lighting and Shadows
Creating realistic lighting and shadows is a breeze with Three.js. To add depth and realism to your scenes, you can experiment with various light sources like ambient, directional, point, and spotlights.
4. Animation and Interactivity
Three.js empowers you to bring your creations to life with animations and interactivity. You can animate objects, control camera movements, and respond to user input to craft dynamic and engaging experiences.
5. Post-Processing Effects
Elevate your visuals with post-processing effects like bloom, depth of field, and vignette. These effects add a layer of polish and professionalism to your 3D scenes.
Getting Started with Three.js
Now, let’s walk through a basic tutorial by making a spinning 3D moon to kickstart your journey with Three.js.
Before starting you can view the live demo here!
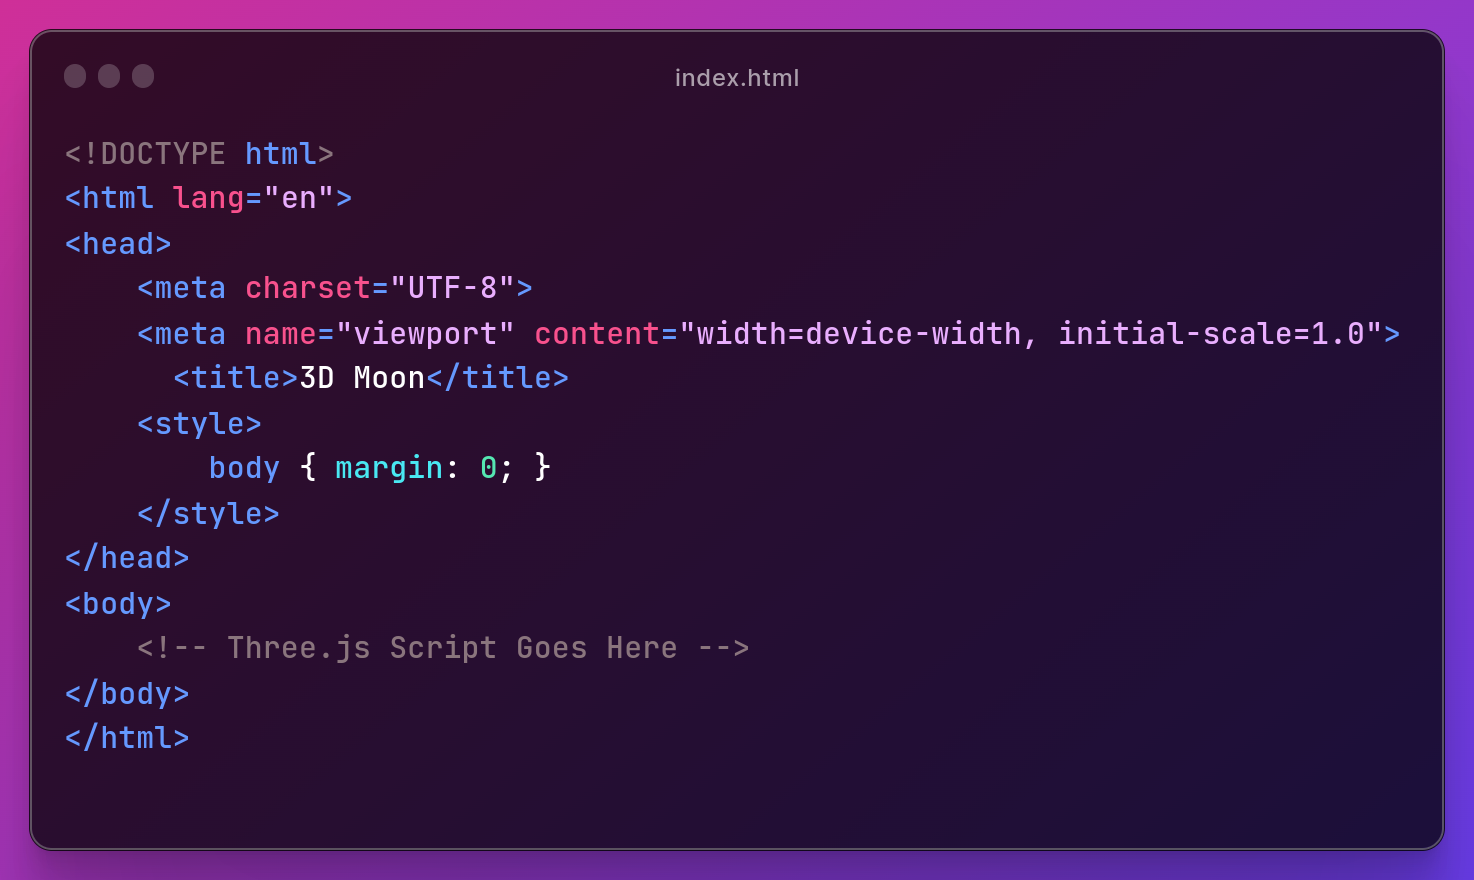
Step 1: Setting Up Your Environment
Section Breakdown:
- Document Type Declaration:
<!DOCTYPE html> declares the document type and version (HTML5 in this case).
2. HTML Root Element:
<html> tags define the root of the HTML document.
3. Head Section:
<head> contains meta-information about the document and external resources like stylesheets and scripts.
4. Character Encoding and Viewport:
<meta charset="UTF-8"> sets the character encoding to UTF-8 for proper text display.
<meta name="viewport" content="width=device-width, initial-scale=1.0"> ensures proper scaling on different devices.
5. Page Title:
<title> sets the title displayed in the browser tab.
6. Internal CSS:
<style> contains CSS rules. In this case, it removes any default margin from the body.
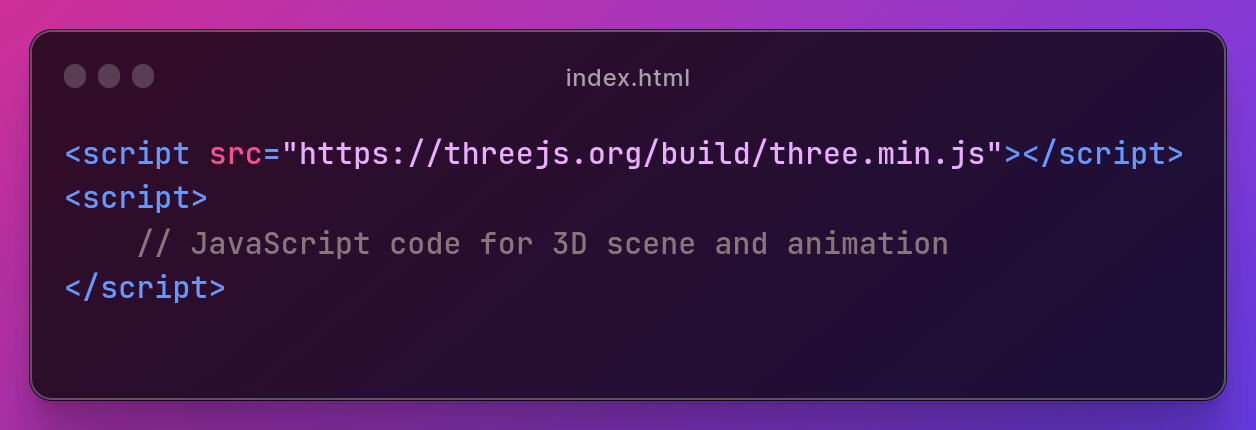
Step 2: JavaScript Section
Section Breakdown:
Loading Three.js Library:
<script src="https://threejs.org/build/three.min.js"></script> loads the Three.js library from an external source.
Script Tags:
<script> tags are used to embed JavaScript code within the HTML document.
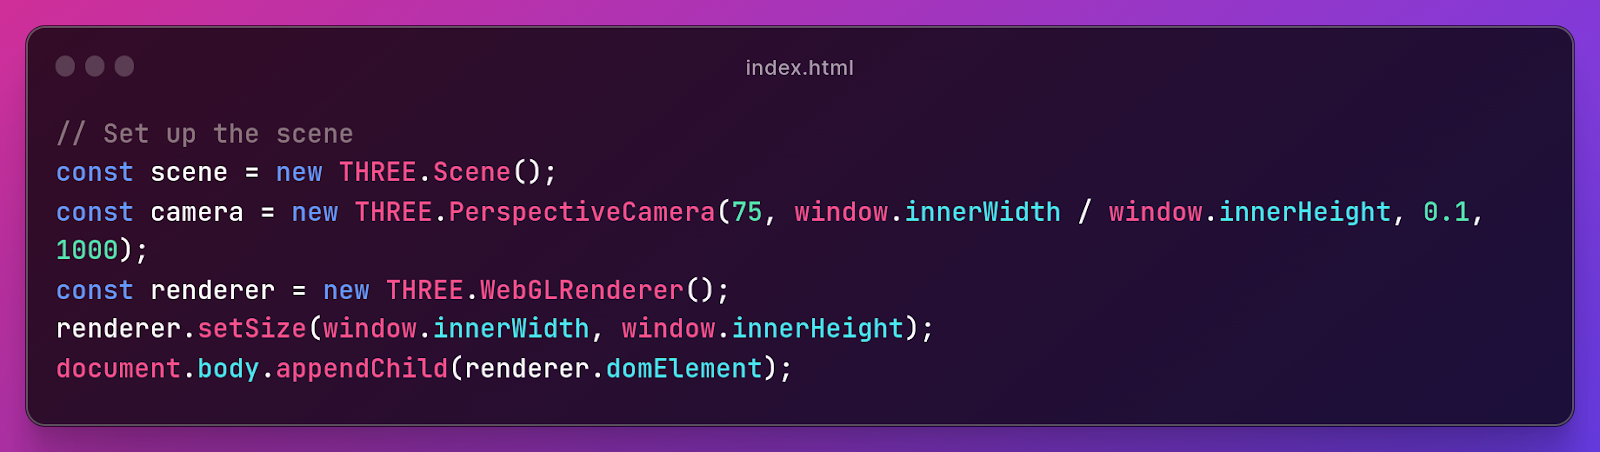
Step 3: Setting up the Scene and Camera
Section Breakdown:
1.Creating a Scene:
const scene = new THREE.Scene(); creates a new 3D scene.
2. Setting up the Camera:
const camera = new THREE.PerspectiveCamera(75, window.innerWidth / window.innerHeight, 0.1, 1000); sets up a perspective camera with specified parameters (field of view, aspect ratio, near and far clipping planes).
3. Initializing the Renderer:
const renderer = new THREE.WebGLRenderer(); creates a WebGL renderer.
4. Setting Renderer Size and Appending to DOM:
renderer.setSize(window.innerWidth, window.innerHeight); sets the size of the renderer to match the window.
document.body.appendChild(renderer.domElement); appends the renderer’s canvas element to the document body.
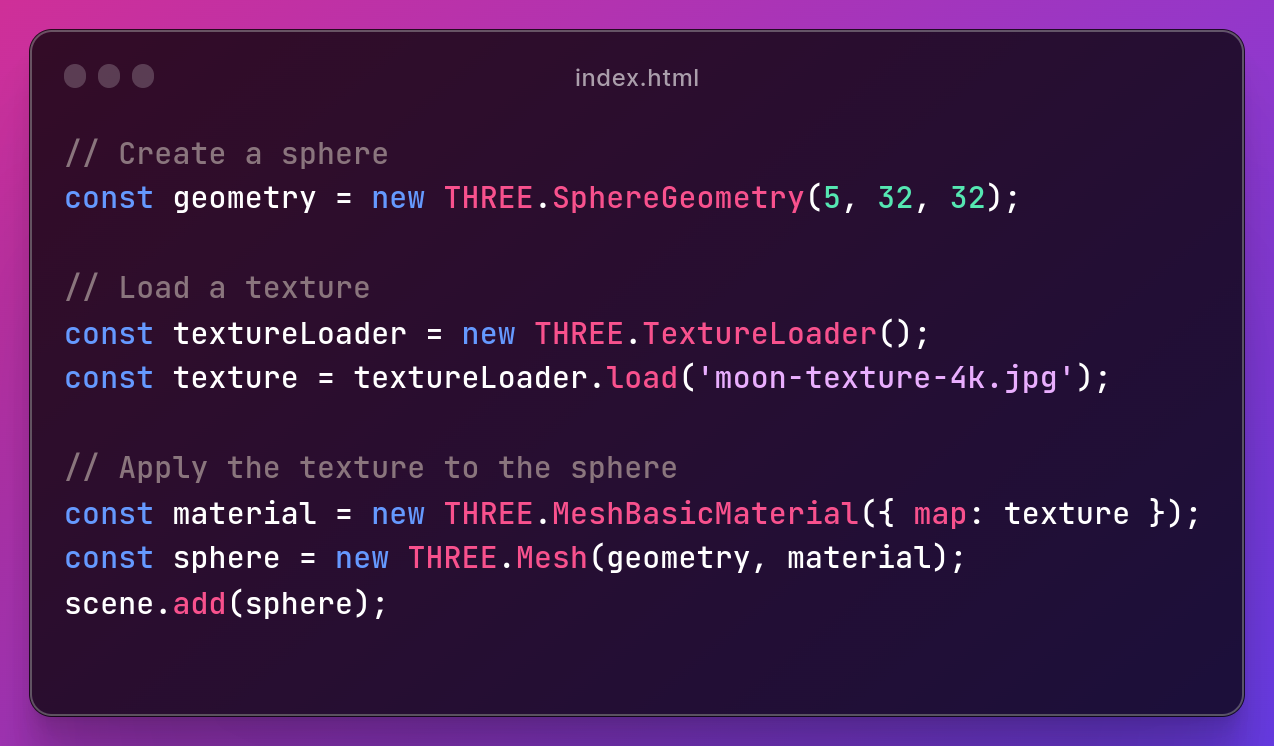
Step 4: Creating a Sphere and Adding Moon Texture
Section Breakdown:
1.Creating a Sphere:
const geometry = new THREE.SphereGeometry(5, 32, 32); creates a sphere geometry with specified radius and segments.
2.Loading a Texture:
const textureLoader = new THREE.TextureLoader(); creates a texture loader.
const texture = textureLoader.load('path_to_your_image.jpg'); loads an image texture.
3.Applying Texture to the Sphere:
const material = new THREE.MeshBasicMaterial({ map: texture }); creates a material using the loaded texture.
const sphere = new THREE.Mesh(geometry, material); creates a mesh using the sphere geometry and applied material.
scene.add(sphere); adds the sphere to the scene.
Step 5:Animating the Moon
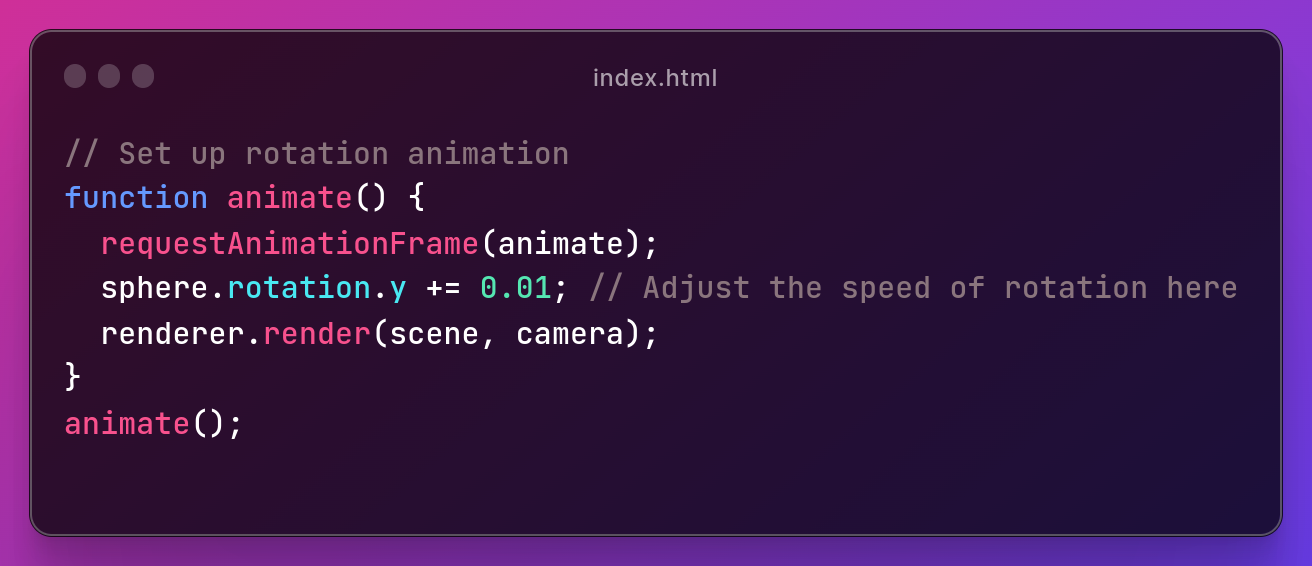
Section Breakdown:
1. Animation Loop:
function animate() { ... } defines an animation loop using a recursive requestAnimationFrame call.
2.Sphere Rotation:
sphere.rotation.y += 0.01; incrementally rotates the sphere around the y-axis. Adjust the value for different rotation speeds.
3.Rendering the Scene:
renderer.render(scene, camera); renders the scene using the defined camera.
Step 6: Setting Camera Position and Handling Window Resizing
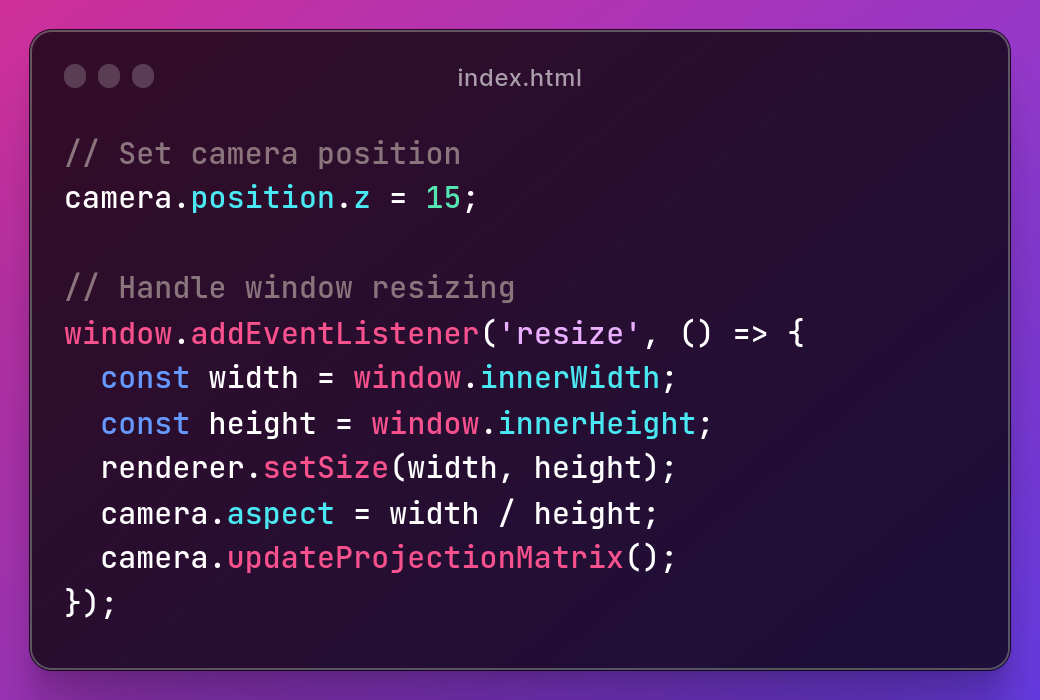
Section Breakdown:
1.Setting Camera Position:
camera.position.z = 15; sets the camera’s position along the z-axis.
2.Handling Window Resizing:
window.addEventListener('resize', () => { ... }); adds an event listener for window resizing.
3.Inside the event handler:
const width = window.innerWidth; and const height = window.innerHeight; retrieve the new window dimensions.
renderer.setSize(width, height); updates the renderer’s size.
camera.aspect = width / height; adjusts the camera’s aspect ratio.
camera.updateProjectionMatrix(); updates the camera’s projection matrix.
Conclusion
And there you have it! You’ve just created a basic 3D scene using Three.js. Customize it further by tweaking textures and rotations. Integrate it into your projects for added charm. Access the full source code here.
In the next part, we will learn to add key, mouse, and touch controls. Happy coding!😃