
In today’s fast-paced business landscape, optimizing processes and maximizing productivity are paramount. Enter the world of Workflow generator – powerful tools designed to streamline, manage, and automate complex tasks and processes. From simplifying intricate workflows to ensuring consistency and compliance, workflow generators revolutionize how organizations operate.
Join us as we explore the transformative capabilities of workflow generators and delve into how they empower teams to achieve peak efficiency and excellence.
What is a Workflow form generator?
A workflow form generator is a software tool or method that helps organizations create, manage, and automate the sequence of steps and tasks required to complete a specific job or process. It functions as a digital assistant, ensuring that everyone knows exactly what they need to do, where they need to do it, and in what order. It’s especially helpful for simplifying complex tasks, reducing errors, and saving time by organizing work efficiently. Consider it a set of instructions and reminders for getting things done quickly and correctly.
Why do we need a Workflow form generator?
In the bustling world of modern business, efficiency is the name of the game. Every minute counts, every task must be executed flawlessly, and every process streamlined for maximum productivity. Amidst this whirlwind, enter the unsung hero: the workflow generator.
But why do we need such a tool, you might ask? We need a workflow form generator for several reasons:
- Efficiency: Workflow generator streamlines processes by automating repetitive tasks, reducing manual effort, and eliminating unnecessary steps, which ultimately saves time and resources.
- Consistency: It ensures that tasks are performed consistently and accurately every time, minimizing errors and improving overall quality.
- Collaboration: It facilitates collaboration by providing a centralized platform where team members can access, track, and update tasks, ensuring everyone stays on the same page.
- Scalability: As organizations grow and processes become more complex, a workflow generator can adapt and scale to accommodate changing needs and requirements.
- Compliance: It helps ensure compliance with regulations and standards by enforcing predefined workflows and documenting each step of the process for auditing purposes.
- Visibility: It provides visibility into the status of tasks and processes, allowing stakeholders to track progress, identify bottlenecks, and make informed decisions.
In essence, a workflow generator is not just a tool – it’s a game-changer. It enhances productivity, reduces errors, improves collaboration, and ensures compliance, making it an essential tool for today’s dynamic business landscape.
How to create a Form using a Workflow generator?
First, create a form using a drag-and-drop interface with components, and then use that form to create a task in your workflow.
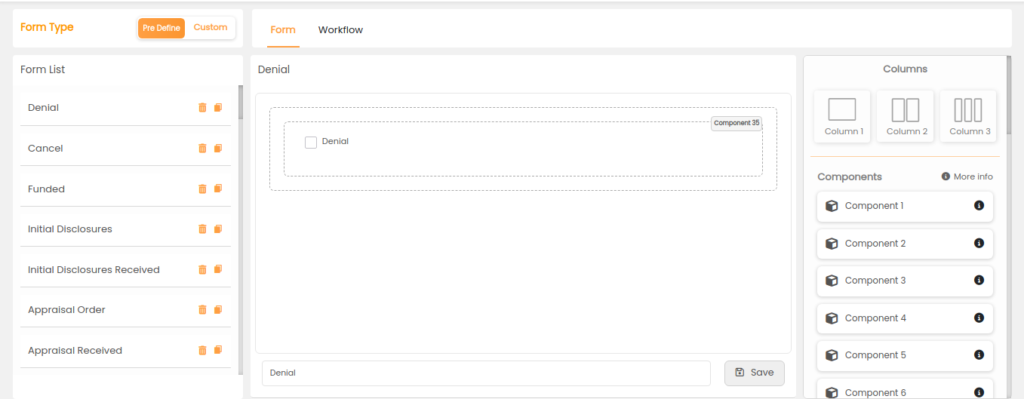
Creating a Form with Columns and Components
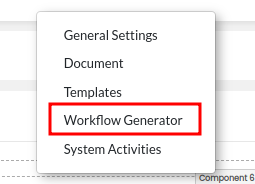
- Access Form Builder
- Log in to your form-building application or system that offers this feature.
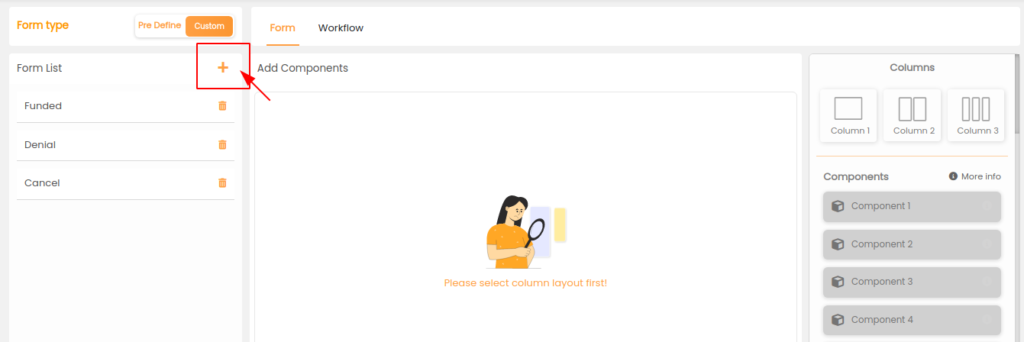
- Create a New Form
- Start by creating a new form within the Form Builder.
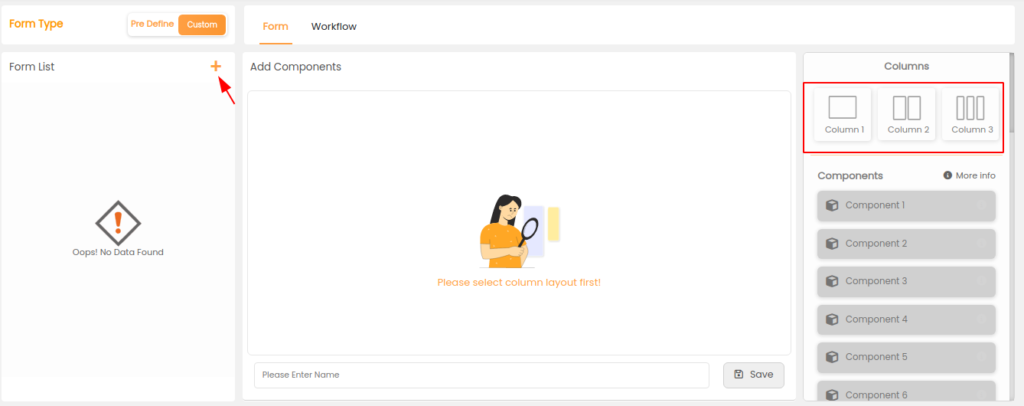
- Add Columns
- Look for an option to add columns to your form. This feature allows you to divide your form into multiple sections or columns, which can be helpful for organizing and structuring your form.
- Drag-and-Drop columns
- Drag and drop the columns onto your form canvas. You can usually customize the width and layout of each column.
- Add Components-to-Columns
- Inside each column, you can add various form components (e.g., text fields, checkboxes, dropdowns, etc.) by dragging and dropping them from a toolbox or palette.
- Configure Component Properties
- Click on each component to configure its properties, such as labels, placeholders, validation rules, and options (for dropdowns or checkboxes).
- Position Components Within Columns
- Arrange the components within each column to design the form as per your requirements. You can adjust the placement and alignment of components.
- Customize Column Layout
- You can also customize the layout of columns, adjusting their widths and positioning to create the desired structure.
- Preview and Test
- Before saving your form, it’s a good practice to preview and test it to ensure it works as expected.
- Save the Form
- Once you are satisfied with the form’s design and functionality, save it with a relevant name.
There are Two Types of Forms: Custom forms and Predefined forms
- Custom Forms
- Users can create and customize forms based on their specific requirements.
- “ADD FORM” functionality allows users to add various components to the forms.
- These custom forms are integrated into the workflow.
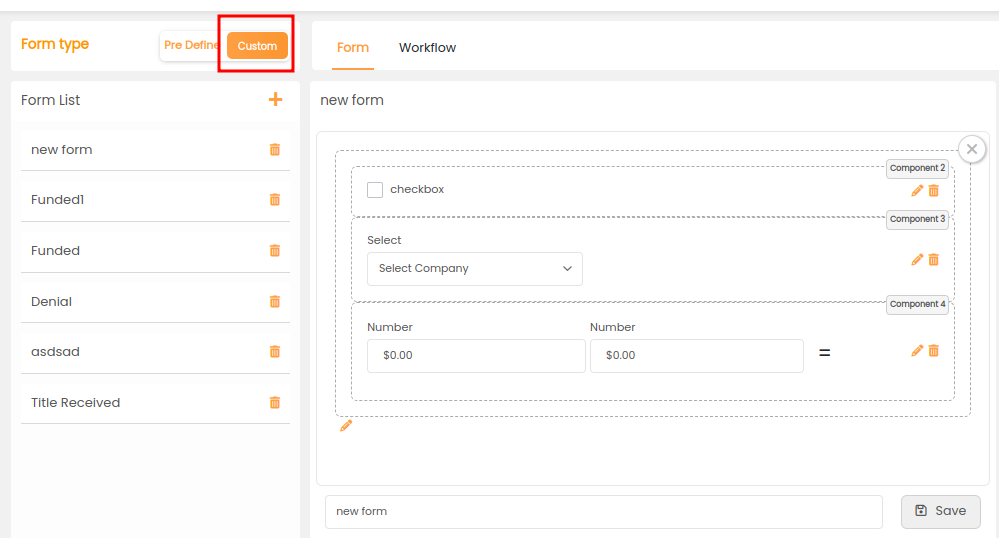
- Click “Create FORM”
- Select and drag a form layout.
- Add desired form components.
- Provide a form name.
- Save the form.
- Predefined Forms:
- Users can select from a list of forms provided by the Super admin.
- These forms constitute the default workflow.
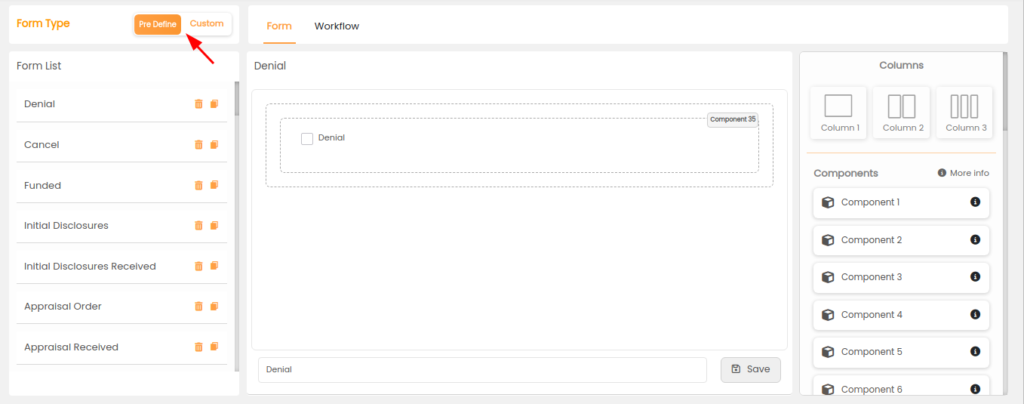
The following steps describe how users can select predefined forms from a list provided by the Super admin, which comprises the default workflow:
- The Workflow Module is accessed by the user
- By logging into the system or application, the user gains access to the workflow creation module.
- Predefined Forms can be viewed here
- When the user enters the workflow module, he or she will see a list of predefined forms. These forms are provided by the Super admin and serve as the workflow’s default templates.
- Choose a Form
- The user can choose from a list of predefined forms to best suit their workflow requirements.
How to create a task?
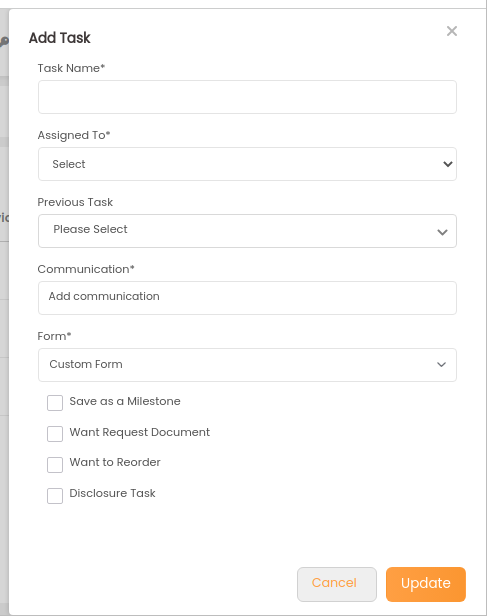
- When the user clicks the “Add” button, a pop-up model for creating and customising a workflow appears.
- To create a task, the user must first:
- Adds a “task name” (for example, “Initial disclosure”).
- Choose a “Role” from a dropdown menu.
- To determine the task’s position in the workflow, select ‘previous task’ from a dropdown.
- Adds communication, such as the ability to select a template from a pop-up model and specify To, CC, and BCC recipients.
- Selects and inserts a form created in the Form module into the workflow.
- Check the “Request document” checkbox if a document is required for this task.
- To initiate this task, check the “Want to Reorder” checkbox.
Using the Form to Create a Task in a Workflow

- Access Workflow Module:
- Log in to your system or application and access the workflow creation module.
- Create a New Workflow:
- If you’re creating a new workflow, start by creating a new workflow template or instance.
- Create a Task:
- Within the workflow, add a new task. This may involve clicking an “Add Task” or similar button.
- Configure the Task:
- In the task configuration interface, you can:
- Set the task name (e.g., “Initial disclosure”).
- Choose a role from a dropdown.
- Define the previous task (if any).
- Add communication details.
- Select the form you created earlier in the “Form” section.
- Save the Task:
- Once you’ve configured the task details and associated the form, save the task.
- Continue Building the Workflow:
- Repeat the above steps to add more tasks as needed within the workflow.
- Review and Save the Workflow:
- After adding all the tasks and configuring the workflow, review it and save it for use.
By following these steps, you can create a form using a drag-and-drop interface and then use that form to create tasks within your workflow. This allows for efficient data collection and task management within your processes.
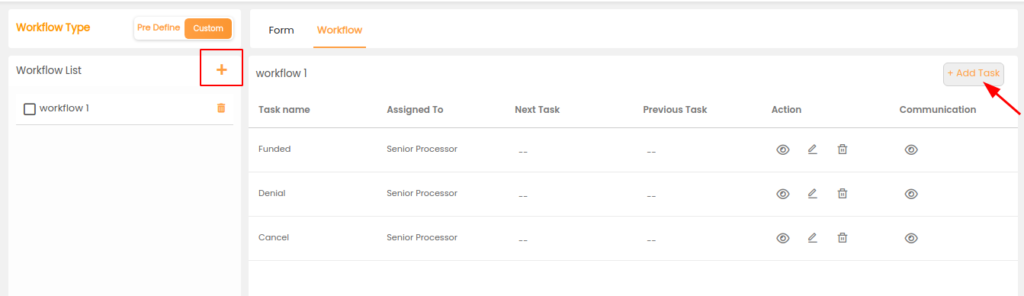
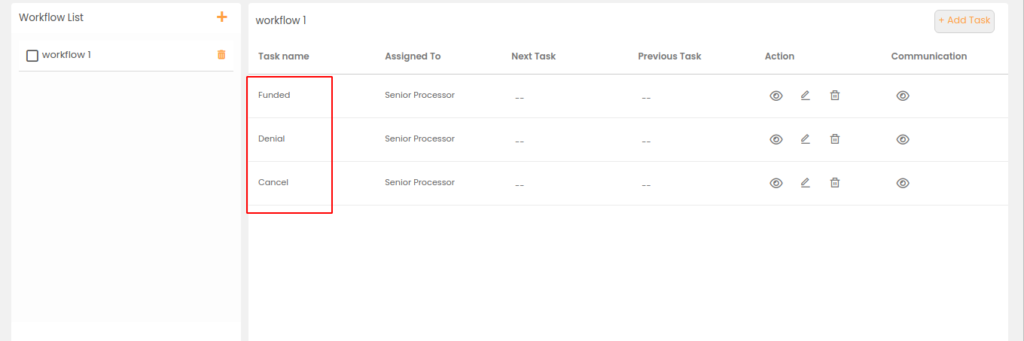
Workflow Submodule Features
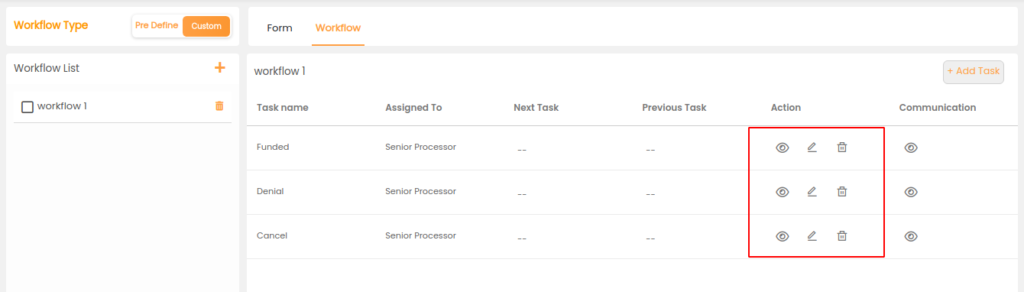
- VIEW: Examine the task displayed in the workflow.
- EDIT TASK: Make any necessary changes to the task.
- DELETE: Removes a task.
This module allows users to create their own workflows and forms while also providing predefined templates for standard processes.
In conclusion, workflow form generators are indispensable tools for modern organizations seeking to streamline processes, enhance collaboration, and ensure compliance. By simplifying complexity, automating repetitive tasks, and providing a centralized platform for communication and task management, workflow form generators empower teams to work more efficiently, reduce errors, and achieve goals with confidence. From simplifying complex workflows to ensuring consistency and accountability, these tools are essential for driving productivity and success in today’s fast-paced business landscape. Embracing the power of workflow form generators is not just a choice – it’s a strategic imperative for organizations looking to stay ahead of the curve and thrive in an increasingly competitive environment.
Read more Agami blogs
Start Your Agami Journey: Schedule Today!